Tuesday, March 30, 2010

Completing foundation, placing windows

I should probably start this post off by explaining a couple things. Number one, I did not explain in my first post the origin of the name for the greenhouse, "The Rubicon." Well, it came up after we (two friends of mine and I) had placed the posts. We had just placed the posts and poured the concrete when we realized that the layout of the greenhouse was not square with the fence behind it, and even worse, the 4 posts themselves were not square with each other.
My face when I realized the problem:


/facepalm. As work continued on the greenhouse, the fact that it was not square became not only an ever-occuring obstacle, but a running joke. Someone joked that it was a rubicon when they meant to say rhombus. This is a rhombus (my greenhouse is more square than this):

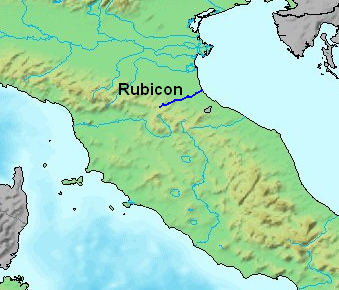
This is the Rubicon (a river in Italy):


Due to its history (see http://en.wikipedia.org/wiki/Rubicon), it seems that "crossing the Rubicon" has become an idiom for crossing the point of no return. I eventually understood that this undertaking was befitting of such a name, since I could not possibly leave it unfinished despite the fact that it would end up costing me far more than I had estimated.
Now, on to some details. I sank 4 posts (4''x4'' x 12') into the ground as corners. We messed that up and it was a rhombus. Big deal I thought. As the pictures below show, I first finished the foundation which was done in drystone. Lots of the stone came from the unearthing of large stones by people putting in a city water line out near my place. (Note: until last year we got our water from a cistern that was replenished by run-off on the roof of the house) I split a lot of the stones with a rotary hammer drill and some wedges and shims. Minus the AC powered drill, people have been cutting stone like that for millennia. So apparently the next picture I have is of the foundation completed, and also the floor, which just consists of stone as well.


So the foundation reached 10-12'' higher than the floor and gave a solid base for the frames to lie on, not to mention boosted effectiveness of the limited window space I would be working with. I also like to build things out of stone. And since I could gather all the stone for free, it seemed like an idea in keeping with the rest of the greenhouse, which was to use recycled or renewable materials.
Here are some pictures on putting in windows:

In this one we have just placed the first window frame. It took a little motivation for it to fit. (We had to hammer it.)


A friend of mine operating a nail gun.


Putting in the first windows in the second wall:


A friend of mine bringing a window around the east wall.


Trying to force a window that doesn't really fit right.


Making real progress.


These next pictures come from the next weekend (October 12th or something).


Putting in rafters.


Drilling them into place with brackets.


At the end of the day.


Other aspect.


The story behind this last picture of the day is somewhat odd. Yes, those are stop-light lenses. Don't ask me why, but a friend of mine had several of them, and he thought it would be a good idea to fill in this hole (one of many left by the odd shape of the windows) with the lenses. It seemed in good keeping with the spirit of the greenhouse, to use recycled materials, so I decided to go with it. It's kind of hard to object when I had no other plan to fill the hole.


Monday, March 29, 2010

The Rubicon is Born


It's impossible now for me to remember when I first wanted to build a greenhouse, but I do remember when I had the idea for this greenhouse. It was late in the summer of 2009 (august?) and I learned that my parents were planning on having new windows installed. I thought to myself, what will they be doing with the old windows? It occurred to me that it might be possible to build a greenhouse from recycled windows. But was that possible? I googled it and found out that it was indeed possible, but discovered that it would have to be done on an ad hoc basis, without any clear plan. Having no overall plan was partially due to having to use windows that varied widely in size and partially to my inability to solve all of the myriad problems of building a greenhouse more than on an individual step by step basis.

I first called my parents and laid claim on the windows. I also picked out a space in the backyard where I would build it. There used to be an old trashed pool shed in the yard next to the fence and the powerline, but it was absolutely wrecked and decaying because the pool had been filled in something like 20 years ago. I wish I had taken a picture of how awful it looked, but I didn't.

I then proceeded to try to convince my wife Lisa that this was a wise move, since the windows would be available for free and I could build everything else extremely cheaply. Note to those who plan on replicating my results, which can't and probably shouldn't be done exactly: it will always cost more than you think. The reason I don't feel so bad about selling my wife on a bad investment is that she was already on notice that the projects I "pitched" to her (and there have been a lot) almost always come in over budget and with a completely different mission statement from when I started. Needless to say, it's been more expensive than I thought it would be.
When it came time for the windows to come out of my parents' house, I made sure that they told the contractor to save the windows and not break them, because I was planning to build a greenhouse with them. He reportedly said "I'll save them, but he won't build it." Hearing this statement from my mom made me realize that I was risking a shame if I didn't follow through with my attempt.
Once I got the windows out and measured them all, I put the measurements down on paper. There were something15 windows, with about 8 different sizes. I dreamt up a roughly 11'x7' structure which would use the most windows. The measurements for length and width were conjured up by closely estimating the distance I'd use between support posts on the ends, including the windows and the framing that would be needed to hold the windows. Once I had those measurements, I pitched the plan to some friends and got them to commit to helping me build the major parts in October of 2009. I'll stop here with some pictures. Unfortunately I didn't start taking pictures until I had cleared the old shed out and put in posts and the door.